Edit code table
Home|Code table
|
Function, command |
Description |
|
General for all point codes |
|
|
Select line type |
|
|
Select which symbol (if any) the point code will have. |
|
|
Link an attribute directly to a point code, a symbol or both. |
|
|
Change the point code when importing from, and exporting to a file. |
|
|
|
|
|
|
|
|
|
|
|
|
All codes which are used at any point in any open file will also appear in the code table. As soon as you open a file or import field data into a survey data file (.sur) all new codes will be inserted into the code table. You may of course have existing codes in the code table even when they are not being used in any open document or drawing. It is not possible to delete an existing code if it has been used in any open document. This is indicated by the delete button being greyed out. It is possible to use different code tables. They can be selected using Home|Settings.
To input a point code:
- Open Edit code table.
- Click New.
- Add the new point code.
In the code table there are up to six different tabs with information and functions used in the survey and to import and export data. The last tab depends what function the code has.
The tabs are:
- Line
Contains information about the type of line, colour and line type scale. - Symbol
Contains information about the type, colour, scale and orientation of the symbol. - Attribute
The attributes of the point code are entered on this tab. - Survey
Information about the type of point, calculation functions, transfer code and in which layer the point code will appear. - Import/Export
Contains the transfer code, layer and export code.
Calculation functions:
- Extrapolate
Calculation function for extrapolation. - Rectangle 2
Calculation function for two point rectangles. - Rectangle 3
Calculation function for three point rectangles. - Circle 2
Calculation function for two point circles. - Circle 3
Calculation function for three point circles. - Arc 2
Calculation function for two point arcs. - Arc 3
Calculation function for three point arcs. - Parallel line
Calculation function for parallel lines. - Closed line
Calculation function for measurement of closed polylines or polygons.
General for all point codes
Grid
Function to edit the code table by a grid. Click the Grid button.
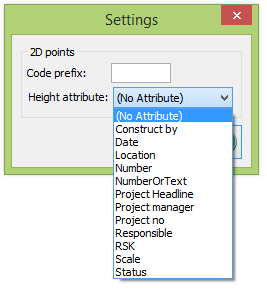 Settings
Function to indicates that the point shall not have a height, by entering a code prefix. For example - (minus sign). The height should be moved to the height attribute. This function works for import to SUR, survey data, drawing and coordinate files.
Description
Description of the point code. This is not essential for the point code to function.
New
Button for creating a new point code.
Delete
Deletes an existing point code. If the point code exists in any open document this button is greyed out because the point code cannot be deleted.
Use Clear button to remove all not referenced point codes from system files.
Linetype
Home|Code table - Line
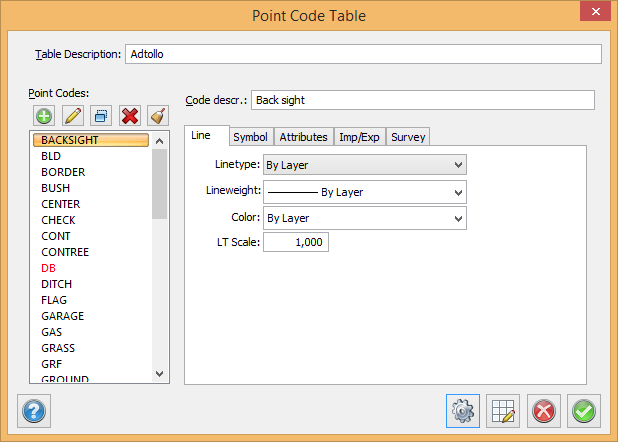
There are several different types of lines to select. It is also possible to select the line type in the Layer manager. This allows you to select the line type in several places, but any line type entered in the code table is given a higher priority than one entered in the layer manager. In the code table it is possible to select the line type by layer.
- Linetype
Select the line type from the list or use the default choice by layer. - Colour
Select the colour of the line type. - Linetype scale
It is possible to select a scale for the line type. This means that you can decide the continuity for different line types. - Use Clear button to remove all not referenced line types from system files.
- >> and << buttons copies all the content from Local to Global and vice versa.
Symbol
Home|Code table - Symbol
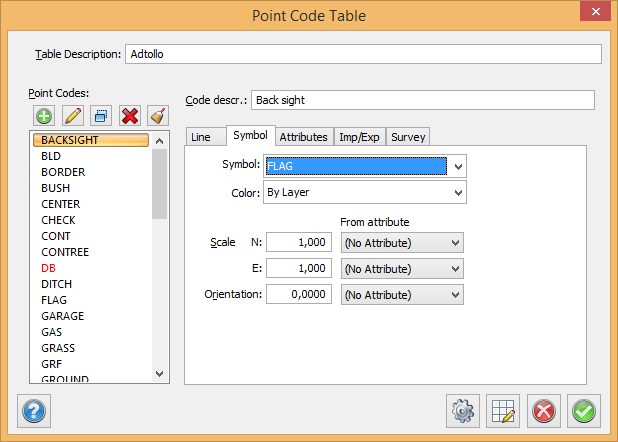
- Symbol
Select which symbol (if any) the point code will have. Select from the drop-down list. - Colour:
Select the colour for the point code. It is also possible to select by layer. - X-scale, Y-scale
The symbol is always saved with a scale of 1:1000. The default drawing scale is also 1:1000. It is possible to select a different drawing scale in Settings|Drawing scale. For example, if you want to the symbol to appear at twice its original size (1:1000) you should enter the scale 2.0 in this field. - Rotation
Determines the rotation for the symbol.
Attributes
Home|Code table - Attributes
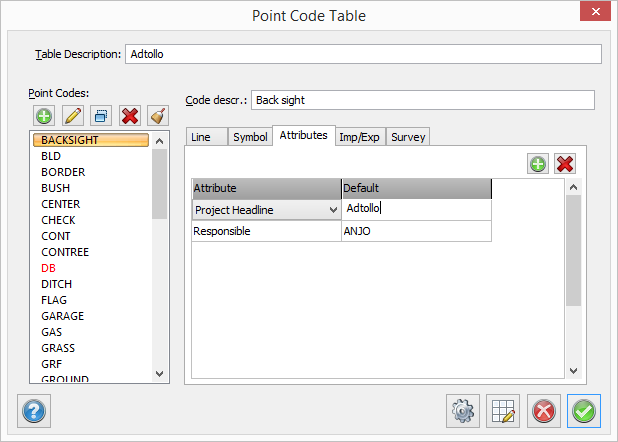
An attribute is a type of added value for the point. An attribute can be linked directly to a point code, a symbol or both. The attribute can be entered in the field survey, the survey data document (.sur) or in the drawing - Go to Modify|Edit attribute. If you link an attribute to a point code you can give every point with this point code an attribute value. If you have used a symbol for the point code and want the attribute to be displayed as well, you will need to create the symbol with a linked attribute. To add an attribute to the symbol see Define attribute
There are no limits to number of attributes that a point can have.
The value of the attribute belongs to the point but the type of attribute belongs to the point code.
Add
Click Add if you want to add an attribute to the point code. The attribute list appears and you can select from the list. To create an attribute go to Home|Attribute
Delete
Press delete if you want to delete a link to the specified attribute. Note that you only delete the link to the attribute and not the attribute itself.
Import/Export
Home|Code table - Import/Export
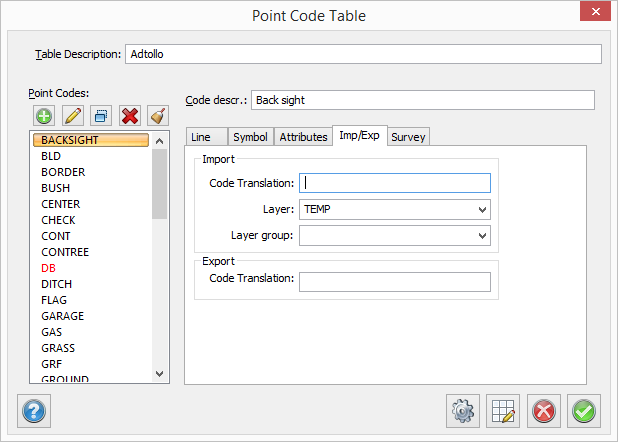
The Import and Export function allows you to change the point code when importing from and exporting to a file. It is also possible to sort the point code into different layers. You will find a similar function for survey data on the previous page - Survey.
Import - Transfer point code:
Interpolates the point code (point in file) to another point code. For example, you can use the numeric point code 10 in the field which is translated to pp in the drawing. A similar function exists for points that are imported from a file. See previous page - Survey.
Layer:
This function allows a point code belonging to a point in a file to be moved to a specific layer. It is possible to use a layer name for all kinds of trees and then put all tree point codes in that layer. It is also possible to create a specific layer for every point code if required. Similar functions exist for points which are imported from files, see previous page - Survey.
Export - Transfer point code:
You can also specify that the point code used in the drawing should be interpolated to another point code when it is exported to a file.
Survey
Home|Code table - Survey
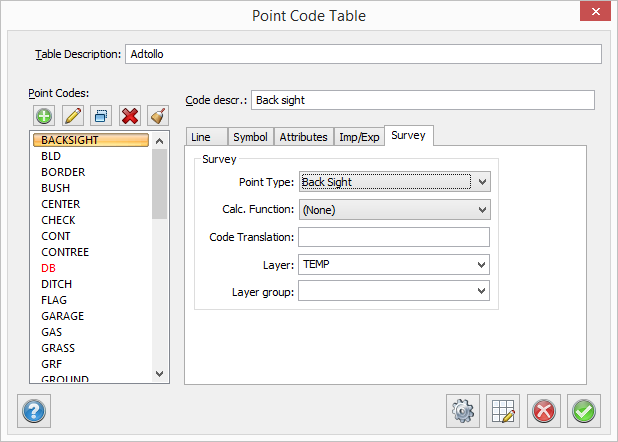
Point type
If the point is to be used as a back sight or control point, save it as a station.
Select "point" or "type" if the a point code shall be used specifically for points or lines.
Calculation function
Different types of calculation functions-.
Translation code:
The code can end up with a different code in the drawing. Enter the name here.
Layer
Which layer is the target layer in the drawing for this code? Enter the name here. The layer will be created if it does not exist.
Point types:
None
Polygon point
The point will be calculated and added to the pp file.
Check point
Used for check towards known point.
Temporary point
The co-ordinates are temporarily saved and the point can be used as a back sight or station in later stations in the same survey file.
Back sight
Function used to code back sights in the survey.
Control codes
Code table + Control table
Point with codes using these point types will have the following control codes:
- Point
- Line: Starts in first point
- Construction point: control point. Will not be included for calculation. Can be used for breaking line and start over with the same code.
Line connection "Code table + Control Code" is also used for general import. Possibility to filter point codes on point type in all controls for selection of point code.
Calculation function
The calculation functions are:
Two prism measurement
The extra two prism measurement function is used when measuring a two prism object. An example is the measurement to the ABC pole which has two prisms at the same pole. You decide from which prism you measure the length to the end of the pole and also which of the two prisms you measure first.
See also
