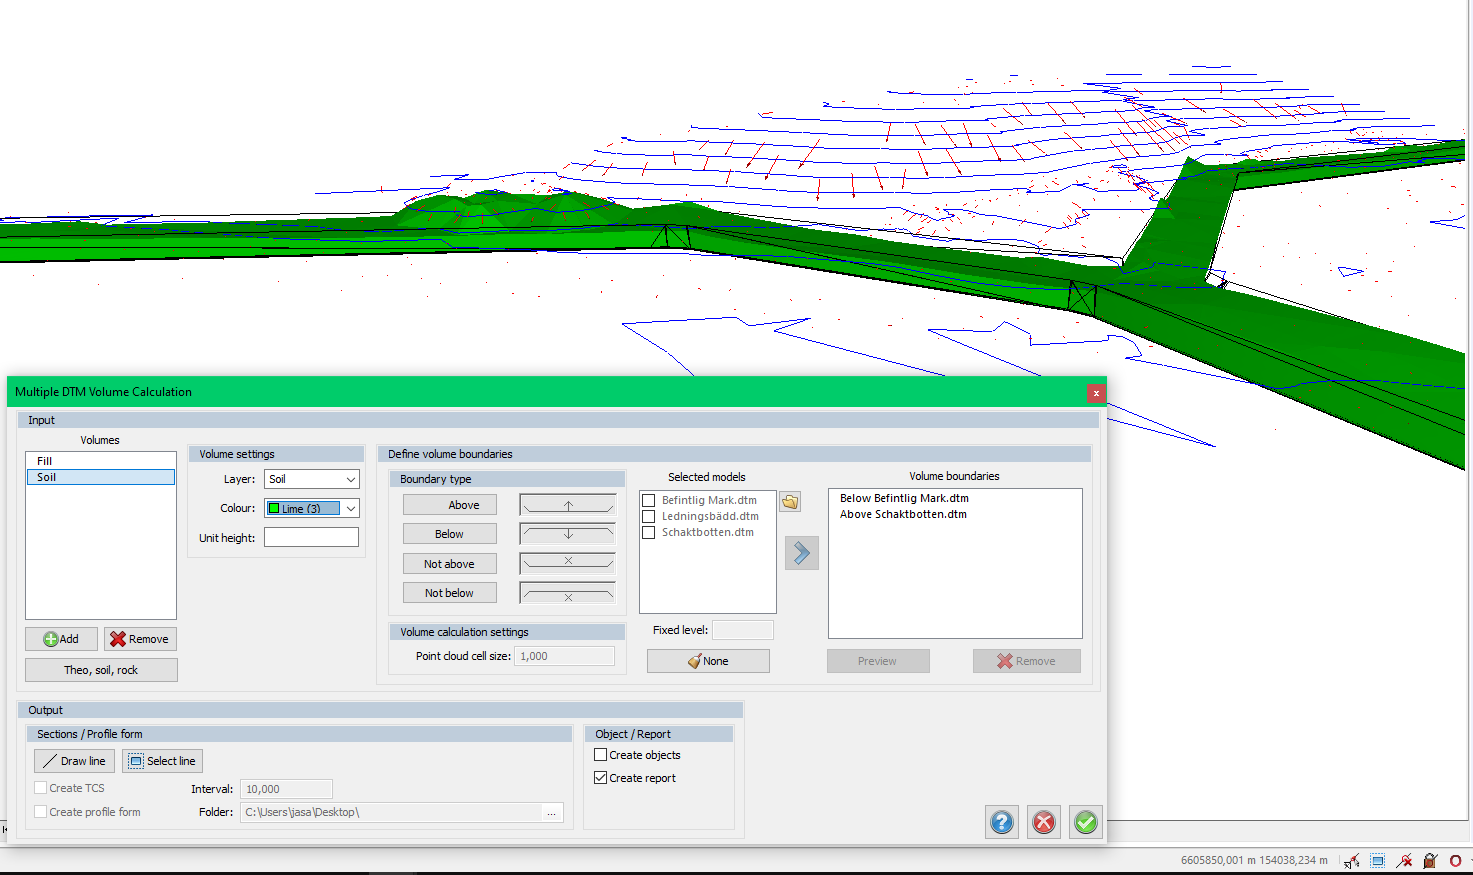
Calculate volumes using Multiple DTM Volume Calculation
Drawing|Terrain|multi DTM
This function calculates volumes between two or more terrain models or point clouds. You can also use a flat height level as a surface to calculate against.
The result can be shown in calculated sections documents, 3D- terrain models with volumes, and reports.
workflow:
- Browse your terrain models and point clouds in the select models browser.
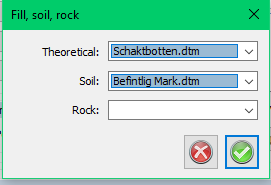
- Define your volumes, we have a quick definition to get Fill, Soil and Rock volumes, you will find the remove and add volume buttons above it.
- IF you want to calculate volumes other than that you can click the add button, name the volume, and set the boundarys of the volume with your models or with a fixed level. There are four types of boundaries to choose from:
- Above
- Below
- Not above
- Not below
This should be used as this: Above > select model A > click the blue arrow, Below > select model B > click the blue arrow.
Now the volume will be defined as above model A and below model B.
This can be tricky at first, you can look at how soil is defined if you use a rock model get the hang of how the not below boundary often is used.
Here is some additional explanation of how the boundaries work.
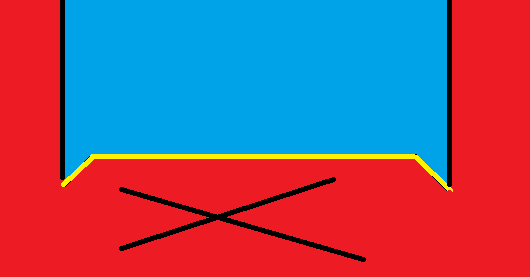
the image above illustrates an "Above", boundary, the red part is not included in the boundary, the blue part is included, the model is in yellow.
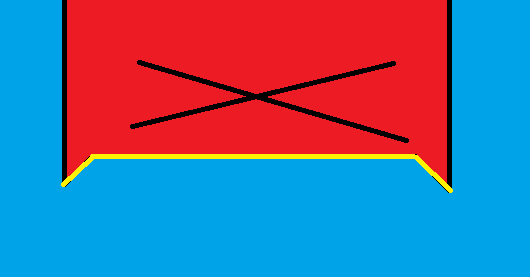
the image above illustrates a "Not above", boundary, the red part is not included in the boundary, the blue part is included, the model is in yellow.
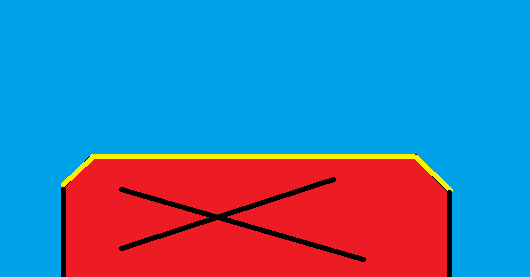
the image above illustrates a "Not below", boundary, the red part is not included in the boundary, the blue part is included, the model is in yellow.
- Pick a colour for the volume, the created 3D solid will get this colour.
- Preview the defined volume, it will be shown in the colour that you have selected for the volume as a 3D volume in the drawing, here you can control that you have defined the volume as you meant to.
- If you want to do sections and profile documents for the calculation proceed with step 8-10 otherwise skip to 11.
- Draw a line through the models, this will be used to create a profile and calculated sections document as output when you are done.
- Set the interval for the sections.
- Set the folder for the resulting output, this is for the profile and calculated sections.
- Decide if you want 3D solids as output or not, often times you want to have them to control that everything looks right.
- Click OK with the green check-mark, your report will be made along with the additional output you have chosen.
Tip: To make the calculations more accurate you can add slope to your models to make them more realistic.
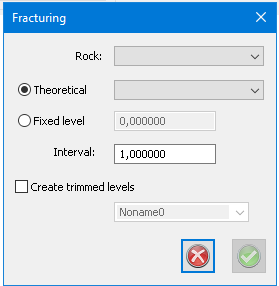
Fracturing
Fracturing is used to slice up a volume between two models or a model and a fixed level into many volumes. This is used most commonly to report rock excavation where you don't do the whole volume in one go with explosives but a more careful method where you want to show each layer of work.
1. Pick a rock model and a excavation bottom or a fixed level.
2. Set an interval, this determines how thick each volume will be.
3. You can create trimmed DTM's for each volume to easily show the area.
Keywords: MultiDTM, calculate volumes